I was so excited to find this online today that I just had to share it!! A recipe safe for water bath canning that looks too good to be true! Cilantro Lime Enchilada Sauce!
Check out the recipe with step by step photo tutorial here:
http://networkedblogs.com/Nv6Lr
I can't wait to try it! Let me know if you have any favorite canning recipes! I've been busy with my summer canning and can't wait to share some tutorials of my own soon!
Wednesday, August 14, 2013
Friday, August 2, 2013
Homeschool: Free Printable Alphabet Lapbook!
When homeschooling is there really any better price then FREE??
I found this great little printable alphabet lapbook and we have been working on it ever since! I thought someone else might like this as well!
http://www.homeschoolshare.com/alphabet_notebook.php

I found this great little printable alphabet lapbook and we have been working on it ever since! I thought someone else might like this as well!
http://www.homeschoolshare.com/alphabet_notebook.php

Thursday, August 1, 2013
Homeschool: Months Of The Year Study
I started my little guy on his Kindergarten work earlier then the normal public school year. I figure we will probably do school year round with small breaks from time to time so it won't be so hard to go back and forth. He likes a predictable schedule so this works well for us so far.
We are just starting to learn "Months Of The Year" so I thought I would share some FREE online resources we use. I hope these help you as well!
Printable Cards:
http://www.hslaunch.com/mypage/downloader.php?file=userfiles/0/66275113769.pdf&id=2163
Song:
http://www.youtube.com/watch?v=5enDRrWyXaw
Worksheets:
http://www.worksheetfun.com/category/spelling/months-of-the-year-spelling/
Printable Mini Book:
https://docs.google.com/file/d/0B3nUpD34cWSeNWUzNmU4ZjUtMWY0ZC00MjM4LWE0NTEtNzkxYjE0ODg4N2Ni/edit?hl=en&authkey=COeRoLIC
Online Game:
http://www.abcya.com/months_of_the_year.htm
Coloring Pages:
http://www.gobookee.net/months-of-the-year-coloring-pages/
Handwriting Worksheets:
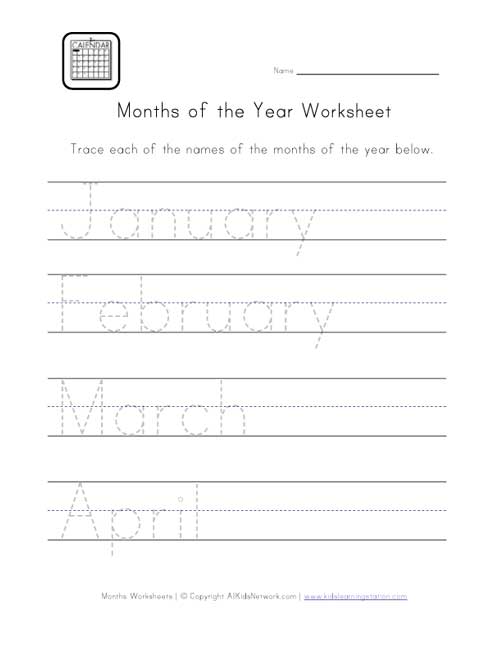
http://www.kidslearningstation.com/months/months-worksheet-handwriting.asp
Unit Study for First Graders:
http://doodlebugsteaching.blogspot.com/2013/07/months-of-year-unit.html
We are just starting to learn "Months Of The Year" so I thought I would share some FREE online resources we use. I hope these help you as well!
Printable Cards:
http://www.hslaunch.com/mypage/downloader.php?file=userfiles/0/66275113769.pdf&id=2163
Song:
http://www.youtube.com/watch?v=5enDRrWyXaw
Worksheets:
http://www.worksheetfun.com/category/spelling/months-of-the-year-spelling/
Printable Mini Book:
https://docs.google.com/file/d/0B3nUpD34cWSeNWUzNmU4ZjUtMWY0ZC00MjM4LWE0NTEtNzkxYjE0ODg4N2Ni/edit?hl=en&authkey=COeRoLIC
Online Game:
http://www.abcya.com/months_of_the_year.htm
Coloring Pages:
http://www.gobookee.net/months-of-the-year-coloring-pages/
Handwriting Worksheets:
http://www.kidslearningstation.com/months/months-worksheet-handwriting.asp
Unit Study for First Graders:
http://doodlebugsteaching.blogspot.com/2013/07/months-of-year-unit.html
Wednesday, July 31, 2013
How To Easily Remove Crayon Marks From Walls
The fact that this is so simple and works so well still amazes me!! I didn't believe it when I first was told about this so I put it to the test! Well, the results speak for themselves!! My 2 year old is quite the artist, but when her crayon drawings moved from paper to the walls, I knew I was in trouble.
If you have the same problem, here is what you need:
Washcloth
Toothpaste
Water
That simple!

First, wet the washcloth. Not soaking wet but nice and damp. Smear on some toothpaste and scrub those walls! That simple!
Here is my wall before (the wonderful artwork!)


If you have the same problem, here is what you need:
Washcloth
Toothpaste
Water
That simple!

First, wet the washcloth. Not soaking wet but nice and damp. Smear on some toothpaste and scrub those walls! That simple!
Here is my wall before (the wonderful artwork!)

And after a little bit of toothpaste and elbow grease!

And finally the last picture...the final results! My wall returned to its normal state...for now!

Tuesday, July 30, 2013
Basic DIY Homemade Cleaners!
We've all been there...last minute plans and guests about to arrive at any moment! Need some ideas to quickly clean the house? Well, here ya go!
Toilet bowl cleaner: Mix 1/4 Cup Baking Soda and 1 Cup vinegar. Pour into basin and let sit for a few minutes. Simply scrub and flush and admire the clean!
Deodorize the garbage disposal: Depending on what you have on hand, either slice a lemon and send it through or peel an orange and send just the peel through. Either way your kitchen will smell citrus fresh!
Deodorize that musty garage/basement/???: Slice an onion and place slices on a plate in middle of the room. Leave for several hours or overnight.
Basic carpet stain removal: Mix equal parts white vinegar and water in a spray bottle. Spray directly onto the stain and let sit several minutes. Clean with a brush or sponge and warm soap water.
Heavy duty carpet stain removal: Mix 1/4 Cup each salt, borax, and vinegar. Rub paste into carpet and leave for a few hours. Vacuum up!
Monday, July 29, 2013
DIY Dishwasher Soap!


This is such an easy money saver!! It uses ingredients I already have around the house which is very helpful! Double or triple the recipe to have a nice supply on hand. One note...be sure to use a good rinse agent. Either a store bought kind, or my personal favorite....plain white vinegar! Super cheap and super effective! Now that's my kind of cleaner! If you do not use vinegar as a rinse aid trying pouring in a dab with the dishes. It helps the soap dissolve thoroughly you do not have any spots on your glasses.
What you will need:
A large container (I used a canning jar, but anything sturdy with an airtight lid should work...think empty butter or ice cream container....or ?? Use your imagination, anything lying around the house is frugal!).
Borax (I prefer 20 Mule Team brand, great quality and easy to find)
Washing Soda (DO NOT confuse with baking soda, you will find this at most grocery stores in the laundry detergent aisle...pictured is Arm & Hammer brand, not picky on brands but I do like this one for most of my cleaners)
Salt ( I use sea salt for everything as pictured, use what you have)
Measuring Cup(s) (one 1 cup and 1 1/2 cup)
Spoon (nothing fancy, just to mix it!)
Alright, first of all, depending on how much you will be making, it may be easier to measure it all out and mix in a mixing bowl.
For one batch, combine 1 Cup Borax, 1 Cup Washing Soda, and 1/2 Cup Salt. Mix well.
To use, add 1 to 2 Tablespoons for each load. No need to fill the soap dispensers in the dishwasher.
Hope you like this recipe as much as I do and remember the note above about the rinse agent....otherwise you will not be as pleased with the results! Enjoy!
Sunday, July 28, 2013
Freezing Bananas!
We have all been there...you buy a bunch of bananas and by the end of the week there are always one or two that didn't get eaten and are starting to turn brown. What do you do? Well, I love to make smoothies so I take the old bananas and freeze them.
There are many idea out there on how to do this, but the way I freeze bananas is like this:
First peel the banana (simple enough).
Second, dip the banana in lemon juice. The easiest way I have found is to put lemon juice in a plastic bag and add the bananas one at a time to get a nice coating. This will help keep the banana from turning brown. Do not leave them in very long, a quick dunk is sufficient.
Lastly, place the bananas in a freezer zip lock bag and freeze. I like to freeze in packs of 2 if possible as this is how many I usually add to my smoothies.
When ready to use, simply add the bananas still frozen directly into the blender with your other ingredients and blend!
Another way is to slice the bananas and flash freeze. To do this, simply slice the bananas after dipping in lemon juice and place on a cookie sheet. Once frozen, remove from the cookie sheet and place in a Ziploc freezer bag or Tupperware.
Super easy and makes sure no bananas are wasted ever again!
Subscribe to:
Posts (Atom)